How to Ride a Motorcycle for Beginners: A Total Rookie’s Guide
So you’ve finally plucked up the courage to begin your foray into the world of two wheeled fun. And for that, we salute you!
The next step of your journey is a whole lot harder; learning how to ride a motorcycle.
When you see a motorcycle rider, it looks so elegant and intuitive. But when you sit on it as a new rider, things tend to get confusing!
Unlike riding a pedal bike or driving a car, riding a motorcycle is a lot more involved and requires a greater level of hand eye coordination.
If you reside in the US, and depending on which state you’re in, you may well be able to jump onto a motorcycle without ANY sort of formal training. Or, at best, a permit or motorcycle license obtained after riding around a car park for one hour.
This is both a blessing and a curse. While it provides freedom with few restrictions, riding on the public highway as a complete rookie is NEVER a good idea.
Good motorcycle riding is about a lot more than just knowing what each hand or foot control does.
I learned this the hard way when I taught myself how to ride over in Thailand. With no prior experience of riding a clutch operated motorcycle, I promptly pulled a stationary wheelie on my brand new bike while less than a mile away from the dealership.
To help you avoid this kind of experience, this article will provide you with an overview of exactly what you need to know to give you the best chances of success.
Controls
Ok, let’s start with the basics. We’re going to run through the use of each lever and foot pedal just in case you’re completely new to motorcycling.
- Clutch Lever: Located on your left handlebar. This lever is responsible for engaging and disengaging the clutch just as the far left foot pedal works in a manual car.
- Brake Lever: Located on your right handlebar. This lever is responsible for applying the front brake and the front brake only unless you’re riding a motorcycle with a combined braking system.
- Throttle: Located on your right handlebar, it forms part of your right grip – the section of handlebar you place your hand on. Unlike the left grip, the right one twists in a counter clockwise motion to apply throttle as required. Your throttle will either be cable or electronically actuated depending on your bike.
- Gear Selector: You will find your gear selector (a.k.a. gear shift lever) located on your left foot control. In conjunction with your clutch lever, the gear selector will allow you to change gear.
- Rear Brake: On the opposite side of the bike is the rear brake pedal which is a foot pedal you will need to operate with your right foot. Just as in a car, the rear brake isn’t quite as strong as the front but is still necessary in riding a bike well.
Gearbox
The gearbox on a manual bike works a little differently than any other vehicle you will likely have come across before.
On your average bike, the gearbox will be laid out in a stacked arrangement meaning that rather than moving the gear selector into a specific position, it’s simply moved up and down.
Most bikes will have 6 forward gears, no reserve and a neutral position.
The gearbox is arranged as follows:
- 6 th Gear
- 5 th Gear
- 4 th Gear
- 3 rd Gear
- 2 nd Gear
- 0 – Neutral
- 1st Gear
What this means is that you need to push the gear lever downwards from neutral to engage 1st gear.
When changing into second, you then push upwards with your foot, bypassing neutral and selecting second. Some gear selectors take quite a bit of work to engage so we recommend always wearing high quality motorcycle boots to prevent damage to your foot.
It sounds complicated in theory but in practice, it’s really simple. To continue changing upwards, you simply push up on the lever until you reach 6th gear and then reverse the process by pushing down until you’re back into neutral or first gear.
To assist, some bikes will be fitted with an electronic gear indicator on the dashboard which will tell you which gear you’re in at any given time.
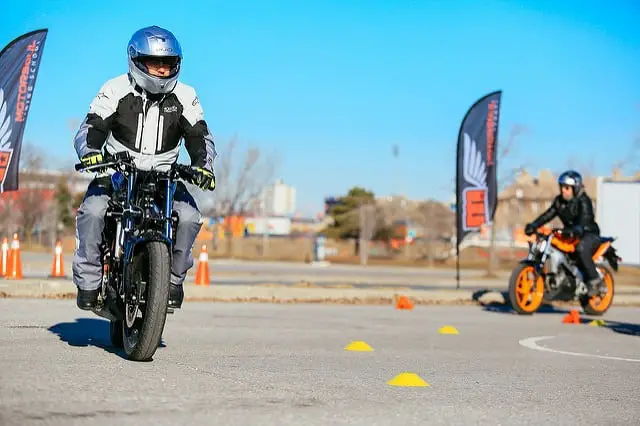
How to Shift Gear on a Motorbike?
If you’re familiar with a manual clutch, you will know it’s a device that disengages the engine from the transmission, allowing you to select another gear.
It works exactly the same way in a manual car. Except with a bike, you have a lever rather than pedal.
- Sit on your bike, makes sure it’s in neutral and then start it.
- Pull in the clutch lever with your left hand.
- While pulled in, engage 1st gear by pushing down on the gear selector. You should hear it clunk into place.
- Slowly open out the clutch lever and you will hear and feel the engine engage against the transmission, moving you forward slowly.
- If you open or let out the clutch too fast, the engine may stall. So be prepared and try not to fall off.
Complete this exercise over and over again until you’re comfortable and you’ve got the mechanics down.
Next, we’re going to add a little throttle!
How to Throttle Properly?
The throttle on any modern motorcycle is a precision tool which needs to be handled with exactly the right amount of force.
Too gentle and you’ll struggle to propel the bike forward and change gear properly. Too harsh and you’ll probably pull a wheelie or spin the rear wheel up!
Get used to twisting the throttle and seeing the revs rise on the tachometer. Get a feel for how your throttle input translates into engine acceleration.
Once you become more confident, handling the throttle forcefully (where required) but precisely will become your second nature.
Using Your Brakes
As I said above, when coming to a stop from speed, any motorcyclist is always going to want to rely heavily on the front brake.
You will feel the bike pitch forward as your weight transfers, loading the front type up and allowing your discs (rotors) and pads to do their job.
The front brake is not an on-and-off switch and needs to be modulated very carefully, especially when riding motorcycles without ABS.
NEVER snatch or grab the front brake! Always apply pressure smoothly but forcefully where required.
Grabbing the front brake may result in the front tire losing traction and you immediately falling off the bike.
And trust me: having even the lightest motorcycle accident even at the training stage is not just embarrassing. It can discourage you too!
The rear brake is great for keeping the bike stable and under control when performing an emergency stop in conjunction with your front brake.
Both the front and rear brake should be used together to brake as efficiently as possible.
How to Ride a Motorcycle in 6 Steps
You should now be set to have a go at riding slowly around your car park or other similar large open space. Recap on all that you’ve learnt as you’ll need to put it into practice.
- Pull your clutch lever in and engage first gear.
- Twist the throttle and hold it steady at around 2000rpm.
- Open the clutch slowly until you feel the engine start to bite and the bike begins to move forward.
- Fully release the clutch slowly whilst maintaining a constant throttle.
- You should now be moving at around 5-10mph so pick your feet up and place them on the pedals. Cover a distance of 20 meters or so if possible.
- To stop, simply reduce your throttle input, brake and then pull the clutch in before you come to a stop to prevent the engine from stalling.
Once you’ve mastered this, you can begin changing gear once on the move and experiment with different braking techniques.
Soon enough, you’ll be ready for your first motorcycle trip!
Steering
At low speeds, steering a motorcycle is just like steering a pedal bike.
You turn the handlebars in the desired direction of travel. What you will soon learn is that this will only work up until around 15-20 mph where you will then have to use a different steering technique:
Counter Steering
Counter steering is often a misunderstood term as it doesn’t work the same way the term suggests it would.
A poor counter steering explanation is responsible for many new riders really struggling with their cornering until they really nail down how this works.
The reason you can no longer simply turn your handlebars at high speed is because of the gyroscopic effect of your bike’s wheels and tires. When in motion, the energy they contain changes the way in which they turn – specifically, your front tire leans rather than turns.
1. To turn right, you need to push the right handlebar forward.
2. To turn left, you need to push the left handlebar forward.
Read those two lines over and over again until they sink in!
To turn or steer, you don’t turn the bars at all. You use either your left or right hand to push the bar it’s holding which is what causes the front tire to lean over and change direction.
There is no pulling, and no turning. Simply pushing.
This can be demonstrated when riding in a straight line at speed. Remove your left hand from the bar. With your right hand, push the right handlebar out away from you. You will then steer to the right.
It’s as simple as that. No other confusing explanation required.
Honing Your Riding Skills
Once you’ve mastered the basics of the controls and how they directly affect what your bike does, you can begin to push yourself and the bike further to learn even more.
You will find that the bike is capable of far more than you ever thought possible. Just watch a MotoGP race for proof.
- Practice stopping quickly and safely from high speed.
- Practice accelerating quickly from a standing start.
- Practice cornering more quickly than you’re used to – if you keep the principals of counter steering in mind, you will amaze yourself at just how readily your bike will go wherever you want it to.
Motorcycle Training Courses
Even if you’re a natural, we would always recommend some kind of formal tuition or training such as an MSF Course where an instructor evaluates your technique and can tell you exactly where you’re going wrong. It’s both a rider training and safety course.
You will learn a lot and pick up loads of tips to help make you a better rider.
The journey to becoming the best rider you can possibly be is paved with near misses, close calls and sometimes nasty accidents so learning from your mistakes and seeking feedback is always the smart choice.
Don’t Forget to Wear Motorcycle Safety Gear!
And of course, we at MotorbikeSecure ALWAYS recommend that you wear protective equipment at all times which includes the minimum of a premium quality motorcycle helmet, boots and gloves.
Frequently Asked Questions
Is it hard to learn to ride a motorcycle?
Most people think motorcycle riding is like riding a bicycle with an engine. (That’s what the first motorcycles even looked like!
The problem is, those people have never ever sat on a motorbike, except maybe as a passenger.
It’s not that riding motorcycles is any kind of rocket science. But it takes considerable amount of practice and patience to get everything right when you’re in full speed on the road.
Is 50 too old to learn to ride a motorcycle?
No! 50, 60 or even 70 is fine as long as you’re in a good shape. It’s NEVER too old to learn to ride a motorcycle.
At least in theory! In practice, you really need to assess your condition, agility and stamina. All of those things can make a huge difference in riding. A certain amount of physical strength is also welcome. Even an experienced rider can drop their motorcycle. And those beasts are quite heavy!

